We've been watching a lot of Star Trek: Voyager lately.
A LOT.
I was a HUGE fan in High School when it originally aired, but I've just now gotten my GF into it. She LOVES 7 of 9 (and not for the obvious reasons).

Watching it now makes me appreciate it on so many more levels. You don't realize how poorly women are written in television/movies until you watch a show that writes strong, independent, respected women -- and does it RIGHT. I'm a little sad we've already started season 7.
So, since my GF is all Trek, all the time right now, she requested Star Trek nails! These were a LOT of fun and marked a lot of firsts for me:
- First time trying Gelish Galaxy Nails
- First time trying a non-Gelish gel polish
- First time painting nail art before applying Top It Off
- First time layering "regular" polish with Gelish polish
Whew! This is gonna be a long post.
So, IMO, Gelish's yellow selection... sucks. Unless you want neon yellow (Coco Cabana Banana) or greyish yellow (Don't Be Such A Sourpuss) you're out of luck. Unfortunately for my GF yellow is her favorite color. So, while we were out at a nail salon supply store she decided to pick up a bright, beautiful canary yellow from a gel brand I've never used or heard of. We grabbed Gella by ENP in "Lily".
The gal at the shop actually told us the brand wasn't that great, but didn't say why. I told her we really just wanted a bright, canary yellow, and our options are limited with gel polish. The polish itself was a bit watery and it took me 3 coats to get full opacity. I put it over a layer of Sheek White in the hopes that it might minimize whatever problems the polish might have (
hopefully it isn't fading) but so far I have no complaints. It seemed to work well with the Gelish polish, Top It Off, and the 18G lamp.
As for the galaxy nails... I've been DYING to do these for, like, a year, but I've been SO intimidated by it. I don't know why, but I've just felt like I was doomed to fail.
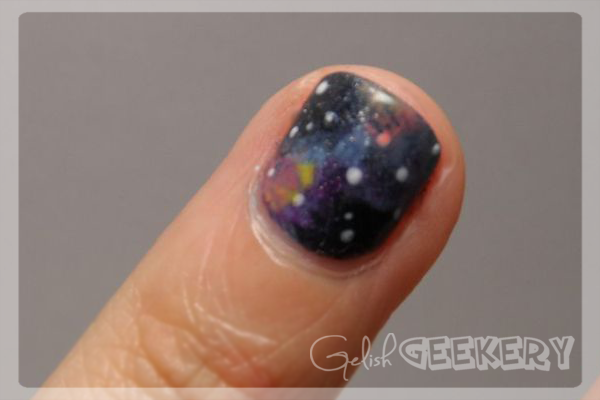
However, I have to say... it was easy! On the second nail I really got the hang of how it should look to make it look more like a nebula and less like a multi-colored marble ;)
I also decided to try something new: rather than apply Top It Off before begining painting details, I wiped off the tacky layer off the cured polished and then began painting with Gelish polish. I'm happy to report that I did NOT expirence the color "bleed" once I began painting! I'm going to keep expiramenting with this method - saves me Top It Off and time under the lamp :)
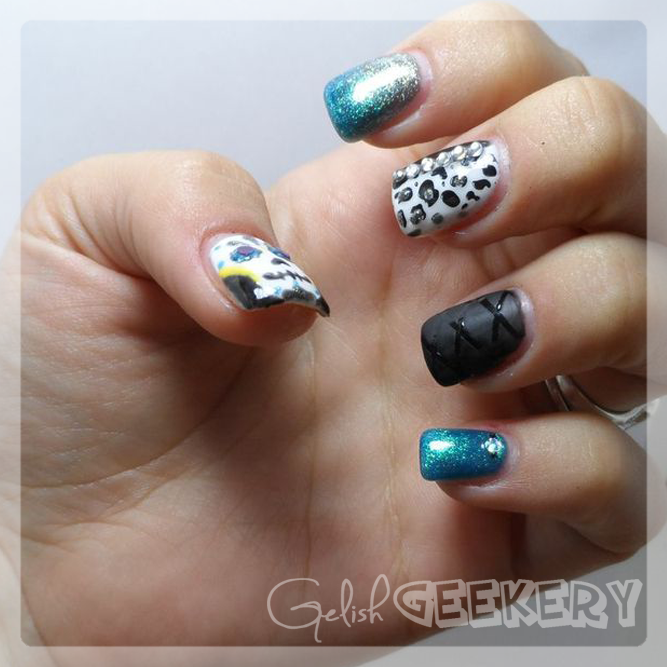
For the above manicure I did the following:
Index, Middle, and Pinky Nails:
- Index: 2 coats Backstage Beauty
Middle: 1 coat Sheek White, 3 coats Gella "Lily"
Pinky: 2 coats My Favorite Accessory
cured all coats
- 1 coat TIO, cure
- Applied striping tape to create triangle shapes
- 2 coats of Black Shadow, cured all coats
- 1 coat TIO, cure (in retrospect, I probably could've skipped this step and wiped the cured, tacky polish layer instead)
- Dabbed Foundation onto the TIO and pressed the studs in, cured
- Painted on the comm badge using Sally Hansen Hard As Nails Xtreme Wear "Golden-I" and Konad Silver polish, let air dry
- Finished with 2 coats of TIO, cured all coats
Thumb Nail:
- 2 coats of Is It An Illusion, cured all coats
- 1 coat Little Miss Sparkle, cure
- Wipe off tacky layer with Cleanser
- Paint a small blue circle with Up In The Blue, cure
- Paint over the blue circle with Twinkle, cure
- Wipe off tacky layer with Cleanser
- Paint the gold accents with Sally Hansen Hard As Nails Xtreme Wear "Golden-I", let air dry
- Finished with 1 coat of TIO, cured
Ring Nail:
- 2 coats of Is It An Illusion, cured all coats
- 1 coat Little Miss Sparkle, cure
- Wipe off tacky layer with Cleanser
- Applied a dab of Up In The Blue to the corner of a make-up sponge and sponged the color on where I wanted it, cured
- Continued to sponge color on with Starburst, Sweet Morning Dew, and Gella "Lily", curing after each color application
- Dotted small "stars" on the nail with Sheek White
- Finished with 1 coat of TIO, cured