


- 1 Gelish Black Shadow mini polish
- 1 Gelish Black Cherry Berry mini polish
- 10 different foil sheets
- 1 wooden cuticle pusher stick
- A How-To booklet


2 coats of The Dark Side
First up, apply 2 coats of your base coat. The directions use the included Black Shadow, but we went with The Dark Side (which, by the way, is WAY more gorgeous than I've ever given it credit for! It's a lovely blue/green/purple/teal.) The instructions then say to let the polish sit on your nails for a full minute after curing the second coat to "let the tacky layer thicken". Truthfully, I had no idea the tacky layer thickened...

Foil scrubbed into the tacky layer with my nail
Next, apply the foil silver side down (colored side up) to the tacky polish layer and press into the polish. I did the initial press and lifted the foil to find only a couple teensy pieces of foil had transferred onto the nail. I pressed the foil back down and began to scrub across it with my thumb nail to REEEALLY transfer the foil into the nail and was happy with the result. I was also suprised by how little foil actually transfers off the foil sheets, so my previous concern about the size and quantity of the foil sheets is moot.

Only a tiny corner of the foil sheet transferred to the nail
Next up, their instructions say to apply a thin coat of Black Cherry Berry over the foil, but I went with another thin coat of The Dark Side. That extra coat of polish really gives the foil a nice, finished look. Before putting the extra coat of polish on it just kinda looked like I'd tried to peel a sticker of my nail and some of the glue and backing was left behind.

A thin coat of The Dark Side completely changes the look of the foil
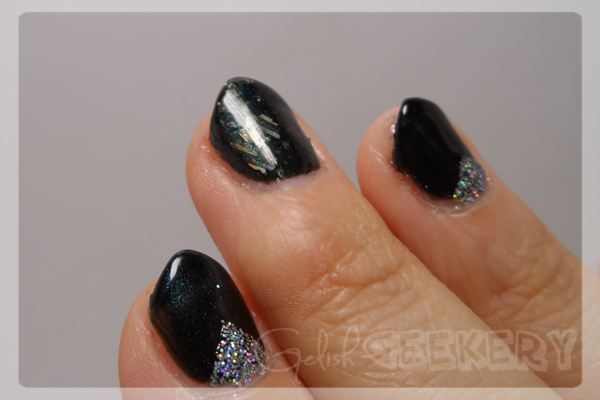
You finish off with TIO and Cleanse, as usual, and here is our final look:
Feel free to ask me any questions in the comments (and, since this is my first review, let me know if I missed any important points/concerns!).


0 comments:
Post a Comment