Showing posts with label Geek Manicures. Show all posts

Sunday, May 4, 2014


My roommate is a big fan of the A Song of Ice and Fire book series, and for the newest season of Game of Thrones she request nails inspired by her favorite house, House Martell. Now that I've seen a few episodes of the new season, I can see why she likes them!

#Badass.

I knew nothing about the Martells and she told me "sand and sunspear", so I went with that.
Gelish Game of Thrones Martell Nails
I finally tried something I've been wanting to try: gel polish sugar nails. I drool every time I see Zoya Pixie Dust pop up on my Instagram feed, and I've really wanted to try to replicate that effect with Gelish. First I tried decorative sand from the craft store, but the grains were way too big, then I tried salt - better, but still large. I stuck with the salt, but I might try actual sugar next time ;)

To do it I mixed a tiny bit of salt with a few drops of polish, then scooped it up with a wide nail art brush and patted it onto the nail. After curing it I got a slightly darker polish color and stippled it across the nail to give it some dimension. Another cure, then I stippled a tiny bit of brown glitter across the nail and finished with a light coat of Top It Off. The technique definitely needs some refining, but at least it kinda worked!

For the above manicure I did the following:

Thumb Nail:
  1. • 1 coat Allure, 1 coat Danny's Little Helpers, and 1 more coat Allure, cure all coats
  2. • Wipe tacky layer. Hand-painted the red sun with Hot Rod Red, cure
  3. • Wipe tacky layer. Hand-painted the spear with yellow and black Folk Art acrylic paint. Let paint dry completely.
  4. • Finished with 2 coats of TIO, cure all coats

Index Nail:
  1. • 3 coats Lust at First Sight, cure all coats
  2. • Dabbed Gelish Structure onto the polish and pressed the studs in, cure
  3. • Finished with 2 coats of TIO, cure all coats

Middle Nail:
  1. • 1 coat Lust at First Sight, cure
  2. • 1 coat All That Glitters Is Gold, cure
  3. • 1 coat Lust at First Sight, cure
  4. • 1 coat of TIO, cure
  5. • Wipe tacky layer. Stamp image using Konad White and MoYou Pro 06 plate. Let dry completely.
  6. • Finished with 1 coat of TIO, cure

Ring Nail:
  1. • Mix Lust At First Sight with salt and pat onto nail, cure
  2. • Stipple A Little Cream Please with nail art brush, cure
  3. • Press a small amount of brown glitter into tacky layer
  4. • Finished with 1 thin coat of TIO, cure

Pinky Nail:
  1. • 2 coats Lust At First sight, cure all coats
  2. • Press gold foil into the tacky layer until desired look is achieved
  3. • Finished with 1 coat of TIO, cure

Wednesday, April 9, 2014


Well, hello there!

So, you may have noticed I've been rather quiet for the last few weeks. Basically, Life Got Hard.
My job position changed dramatically, I've been training a new hire, my fiancée and I have been busy doing Wedding Stuffs, and basically I've been coming home every day and that last thing I've wanted to do was write a blog post. But! I'm settling in and trying to regain my balance, and nails are 100% a part of that balance. ;)

One of the ways I've been unwinding over the past couple of weeks is by watching a Japanese game. But, it's like an anime. But you read it. It's like reading a manga, but with voice actors, and on your TV. It's called Dramatical Murder (and if you google it... just be warned that it's, well, rated 18+) and it's silly, and quite dramatical, but we're totally hooked on it. And after we started watching it we found out an actual anime based on the game is being released this summer!

This is gonna be such a great summer for anime. The new Sailor Moon, Iwatobi Swim Club, Dramatical Murder, and a couple others.

It's a good time to be a nerd.

And there's totally a point to all this anime talk... Dramatical Murder-themed nails!

First off, my fiancée got nails themed after the protaganist, Aoba. I freakin' love Aoba.
For the Aoba set the colors used were Up In The Blue, Ocean Wave, Arctic White, It's A Lily, Jet Set, Need A Tan, and Don't Be Such A Sourpuss. I hand painted everything :)
Gelish Dramatical Murder Aoba Anime Nails
Then, she got nails themed after one of the other characters, Noiz (I know, the names are like, wut? But it's anime, so it makes sense). I didn't like Noiz at first, then after they dug in to his backstory he's really grown on me.
For Noiz I used Sometimes A Girl's Gotta Glow and Is It An Illusion? I used Gella 'Lily' for the yellow bits and used black acrylic paint for the black accents. That black paint really helped the nails pop, so I'm really happy with this set :)
Gelish Dramatical Murder Noiz Anime Nails

Sunday, March 2, 2014

My roommate loves Hello Kitty.

I think she has a Hello Kitty doll for every season of the year, we have a Hello Kitty shopping bag, I believe her wallet is Hello Kitty... about 11 years ago, back in our college days, she got me OBSESSED with a Hello Kitty game for Gameboy Color. So when she said she wanted black and red nails for her upcoming Vegas trip, I decided to give Hello Kitty a try.
Gelish Hello Kitty Nails
Not too shabby, if I do say so myself! I hand-painted the Hello Kitty - first time I've ever hand-painted something quite like that before. I made some mistakes and learned some lessons - for example, that middle finger? With the cute bow and polka dots? I layed down 2 coats of Black Shadow first, then when it came time to add the red, I realized too late that Hot Rod Red is WAY too sheer and would've needed a gazillion coats to achieve opacity over the black. I ended up putting down 2 coats of Arctic Freeze THEN 3 coats of Hot Rod Red on top of that. Below, I'm going to write out the steps as they SHOULD have been, not as I actually did them. -_-

Seven. Coats. Of polish.
I have to say, painting that black outline around the Hello Kitty was the hardest part. I'm sure it gets easier with practice, but MAN that takes a steady hand. All in all the mani took 3 freaking hours, but it was worth it when my roommate told me one of her coworkers thought the painted Hello Kitty was a sticker! ;) It was reeeeally important for me to get the Hello Kitty right. I wanted to make sure she looked like Hello Kitty and not, like, Hellow Catty.
All in all I'm really enjoying hand-painting designs. Hopefully I'll get better with practice!

For the above manicure I did the following:

Thumb Nail:
  1. • 2 coats Black Shadow, cure all coats
  2. • 1 coat Matte TIO, cure
  3. • Wipe tacky layer. Using a nail art brush, paint bow using 1 coat of regular TIO, cure

Index Nail:
  1. • 2 coats Hot Rod Red, cure all coats
  2. • Wipe tacky layer. Using a nail art brush, paint stripes using 2 coats of Black Shadow, cure all coats
  3. • Finished with 1 coat of TIO, cure

Middle Nail:
  1. • 3 coats Hot Rod Red, cure all coats
  2. • Wipe tacky layer. Using a nail art brush, paint black half moon with Black Shadow and flash cure. Continue painting the bow and polka dots with Black Shadow, flash curing as needed. Cure for full time when complete.
  3. • Finished with 1 coat of TIO, cure

Ring Nail:
  1. • 3 coats Hot Rod Red, cure all coats
  2. • Wipe tacky layer. Using a nail art brush, paint Hello Kitty using Sheek White and Go Girl, flash curing as needed. Cure for full time when complete. Then using black Folk Art acrylic paint, paint the outline and black details. Let fully dry.
  3. • Finished with 2 coats of TIO, cure all coats

Pinky Nail:
  1. • 2 coats Hot Rod Red, cure all coats
  2. • 2 coats Life of the Party, cure all coats
  3. • Finished with 1 coat of TIO, cure

Wednesday, January 29, 2014

Gelish Sailormoon Nails
So, I'm a pretty big Sailormoon fan.
In middle school (which was around the time of the original broadcast, so I think I can be a hipster about liking it before it was cool ;) I remember secretly asking my mom if she could tape Sailormoon for me. Then I remember talking my mom into changing our cable subscription when I found out new episodes of Sailormoon would be airing on some then-unknown channel called Cartoon Network. Once I started driving I was at the comic book store and collected the english monthly comics that they started releasing (anyone remember MixxZine??).

Now that the rights have been renewed it's Sailormoon fever! Merchandise is everywhere, which is fine, but I'm MOST excited about the upcoming Sailormoon TV series reboot (now pushed back to summer)!!! I recently read that the reason there were so many "filler" episodes in the original series was because they were producing it AS Naoko Takeuchi was writing the manga, so they actually didn't know what the story was going to be! I'm hopeful for an improved, slightly more adult storyline with knock-out gorgeous animation. Also, Haruka and Michiru (so help me if English dubbers translate them as "cousins" again... someone gonna get hurt).

So I was really excited when my roommate requested Sailormoon nails!
Gelish Sailormoon Nails
I went with Sailromoon-inspired rather than literal. I needed 3 coats of Arctic Freeze for opacity and free-handed the thumb, index, and middle fingers with gold and silver acrylic paint. The pinky is just a bit of craft store glitter. On her ring finger I used Konad gold stamping polish and MoYou Pro Collection 07 plate. I've decided I don't like the Konad gold and need a new gold polish that's a bit more opaque and vibrant. Any good suggestions?

Wednesday, November 20, 2013

Doctor Who Scarf Nails
In honor of the 50th Anniversary special of Doctor Who coming up, my roomie requested Doctor Who nails. I perused the interwebz for ideas and I decided to go with something that wasn't popping up - the infamous scarf!
I used a TON of colors on this one and custom mixed a few using my favorite yellow, Gella in "Lily". I created the blocked scarf gradient across her fingers and did a galaxy nail on her thumb (same colors and methods I used on the Star Trek mani).
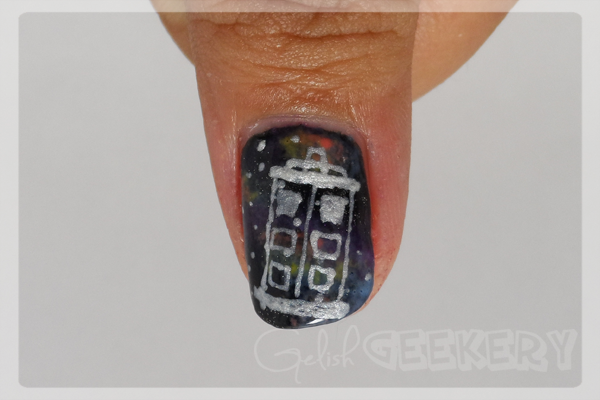
Doctor Who Tardis Nail
I then used my new Migi nail art pens to draw a Tardis outline (which I pursed my lips at due to the lines being shaky... before I realized we BOTH have carpal tunnel and our hands were twitching all over the place >D )

Sunday, November 10, 2013

Gelish Adventure Time Nails I. Love. Adventure Time.

"But it's a kids show!/It doesn't make sense!/It's just weird!"

Au contraire.

This show is FULL of adult themes and humor and some really intense imagery that seems like nonsense at face-value but can be deconstructed for further meaning. The show is LITTERED with subtle geek culture references, from Sailor Moon, to Batman, and I think a recent ep was referencing Totoro. These 15 minute episodes are full of character development, recurring themes, and SO MUCH BACK STORY. When you watch the show, keep in the back of your head that the show is set in post-apocalyptic earth and suddenly background scenery and seemingly nonsense dialouge will seem much more significant.
Go watch the episode "What Was Missing". It's 13 minutes of your life you won't regret. Then start from season 1. It gets better every season.

So ANYWAY we went to the Comikaze con last weekend in Los Angeles and had a toooon of fun! I decided I HAD to do some nerdy nails for the con and I wanted to rock my Adventure Time pride!
Gelish Adventure Time Nails
Gelish Adventure Time Finn and Fionna Nails
These nails are soooo much fun and I got a ton of compliments! IN FACT, the gals at the Boom Studios booth loved them and took pics of them... AND tweeted them to the Boom Studios twitter account!! MATHEMATICAL!!!

I did Adventure Time with Finn & Jake on my right hand and Adventure Time with Fionna & Cake on my left hand. I'd love more Fionna and Cake episodes, but Adam Muto seemed pretty adamant that Ice King's foray into fanfic is done (but, hey if Xergiok can make another appearance pretty much anything is possible, right? Right!? *siiigh*)

I should also mention that I fixed 4 chipped corners on my right hand using the chipped nail tutorial I posted earlier this week! :D So far, no problems!

For the above manicure I did the following:

Thumb Nail:
  1. • 2 coats Up In The Blue, cure all coats
  2. • Wipe tacky layer. Using a nail art brush, applied Sheek White for the hat shape, cure
  3. • Mixed Skinny Vanilla Latte with a bit of Sheek White on a piece of foil
  4. • Wipe tacky layer. Using a nail art brush, applied Skinny Vanilla Latte/Sheek White in the desired shape for the face, cure
  5. • Applied 1 coat of TIO, cure
  6. • Wipe tacky layer. Using a nail art brush and FolkArt acrylic paints, added the face and hair details
  7. • Finished with 2 coats of TIO, cure

Index Nail - Jake:
  1. • Mixed Gella "Lily" with a bit of Orange Cream Dream on a piece of foil and applied 1 coat to whole nail, cure
  2. • Applied 1 coat of TIO, cure
  3. • Wipe tacky layer. Using a nail art brush and FolkArt acrylic paints, added the face details
  4. • Finished with 2 coats of TIO, cure

Index Nail - Cake:
  1. • 2 coats Sheek White, cure all coats
  2. • Wipe tacky layer. Using a nail art brush, painted yellow spots with Gella "Lily", cure
  3. • Using a nail art brush and FolkArt acrylic paints, added the face details
  4. • Finished with 2 coats of TIO, cure

Middle Nail:
  1. • 2 coats Up Take Action, cure all coats
  2. • Wipe tacky layer. Using a nail art brush, applied Make A Difference for hair, cure
  3. • Applied 1 coat of TIO, cure
  4. • Wipe tacky layer. Using a nail art brush and FolkArt acrylic paints, added the face and crown details
  5. • Added a tiny dot of Up In The Blue for the crown detail, cure
  6. • Finished with 2 coats of TIO, cure

Ring Nail:
  1. • 2 coats Cashmere Kind of Gal, cure all coats
  2. • Wipe tacky layer. Using a nail art brush, applied Cocktail Party Drama for hair, cure
  3. • Applied 1 coat of TIO, cure
  4. • Wipe tacky layer. Using a nail art brush and FolkArt acrylic paints, added the face and bite mark details
  5. • Finished with 2 coats of TIO, cure

Pinky Nail:
  1. • Mixed Gella "Lily" with a bit of Orange Cream Dream on a piece of foil and applied 2 coats to whole nail, cure all layers
  2. • Wipe tacky layer. Using a nail art brush, applied Orange Cream Dream for hair, cure
  3. • Applied 1 coat of TIO, cure
  4. • Wipe tacky layer. Using a nail art brush and FolkArt acrylic paints, added the face and red gem details
  5. • Finished with 2 coats of TIO, cure

Sunday, September 8, 2013

Gelish Star Trek Nerd Nails We've been watching a lot of Star Trek: Voyager lately.

A LOT.

I was a HUGE fan in High School when it originally aired, but I've just now gotten my GF into it. She LOVES 7 of 9 (and not for the obvious reasons).
Watching it now makes me appreciate it on so many more levels. You don't realize how poorly women are written in television/movies until you watch a show that writes strong, independent, respected women -- and does it RIGHT. I'm a little sad we've already started season 7.

So, since my GF is all Trek, all the time right now, she requested Star Trek nails! These were a LOT of fun and marked a lot of firsts for me:
  • First time trying Gelish Galaxy Nails
  • First time trying a non-Gelish gel polish
  • First time painting nail art before applying Top It Off
  • First time layering "regular" polish with Gelish polish
Whew! This is gonna be a long post.

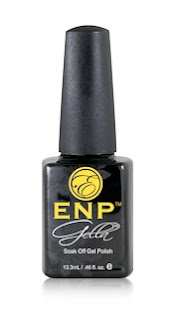
So, IMO, Gelish's yellow selection... sucks. Unless you want neon yellow (Coco Cabana Banana) or greyish yellow (Don't Be Such A Sourpuss) you're out of luck. Unfortunately for my GF yellow is her favorite color. So, while we were out at a nail salon supply store she decided to pick up a bright, beautiful canary yellow from a gel brand I've never used or heard of. We grabbed Gella by ENP in "Lily".
ENP Gella Lily
The gal at the shop actually told us the brand wasn't that great, but didn't say why. I told her we really just wanted a bright, canary yellow, and our options are limited with gel polish. The polish itself was a bit watery and it took me 3 coats to get full opacity. I put it over a layer of Sheek White in the hopes that it might minimize whatever problems the polish might have (hopefully it isn't fading) but so far I have no complaints. It seemed to work well with the Gelish polish, Top It Off, and the 18G lamp.

As for the galaxy nails... I've been DYING to do these for, like, a year, but I've been SO intimidated by it. I don't know why, but I've just felt like I was doomed to fail.
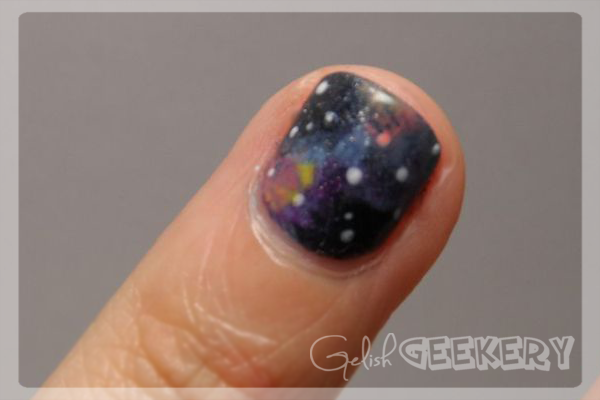
Gelish Galaxy Nail
However, I have to say... it was easy! On the second nail I really got the hang of how it should look to make it look more like a nebula and less like a multi-colored marble ;)

I also decided to try something new: rather than apply Top It Off before begining painting details, I wiped off the tacky layer off the cured polished and then began painting with Gelish polish. I'm happy to report that I did NOT expirence the color "bleed" once I began painting! I'm going to keep expiramenting with this method - saves me Top It Off and time under the lamp :)
Gelish Star Trek Nerd Nails
For the above manicure I did the following:

Index, Middle, and Pinky Nails:
  1. Index: 2 coats Backstage Beauty
    Middle: 1 coat Sheek White, 3 coats Gella "Lily"
    Pinky: 2 coats My Favorite Accessory
    cured all coats
  2. 1 coat TIO, cure
  3. Applied striping tape to create triangle shapes
  4. 2 coats of Black Shadow, cured all coats
  5. 1 coat TIO, cure (in retrospect, I probably could've skipped this step and wiped the cured, tacky polish layer instead)
  6. Dabbed Foundation onto the TIO and pressed the studs in, cured
  7. Painted on the comm badge using Sally Hansen Hard As Nails Xtreme Wear "Golden-I" and Konad Silver polish, let air dry
  8. Finished with 2 coats of TIO, cured all coats
Thumb Nail:
  1. 2 coats of Is It An Illusion, cured all coats
  2. 1 coat Little Miss Sparkle, cure
  3. Wipe off tacky layer with Cleanser
  4. Paint a small blue circle with Up In The Blue, cure
  5. Paint over the blue circle with Twinkle, cure
  6. Wipe off tacky layer with Cleanser
  7. Paint the gold accents with Sally Hansen Hard As Nails Xtreme Wear "Golden-I", let air dry
  8. Finished with 1 coat of TIO, cured
Ring Nail:
  1. 2 coats of Is It An Illusion, cured all coats
  2. 1 coat Little Miss Sparkle, cure
  3. Wipe off tacky layer with Cleanser
  4. Applied a dab of Up In The Blue to the corner of a make-up sponge and sponged the color on where I wanted it, cured
  5. Continued to sponge color on with Starburst, Sweet Morning Dew, and Gella "Lily", curing after each color application
  6. Dotted small "stars" on the nail with Sheek White
  7. Finished with 1 coat of TIO, cured

Wednesday, August 7, 2013

Gelish Nail Art DC Comics Earlier this year the GF and I decided to go to Wondercon in Anaheim. After a lot of bribing and urging on her part, I decided to cosplay as Marceline to to her Finn. I spent a week buying supplies and outfit essentials, then handmade myself a little stuffed Hambo.

I LOVE my Hambo. I can't even.

I also decided I HAD to do DC-inspired Gelish nerd nails, because we're big into the Bat family - and appreciate the other guys, too ;) In retrospect it was a silly thing to do since my costume required gloves, but it taught me some important tips for painting nail art with Gelish.

Gelish Nail Art DC Comics Gelish Nail Art DC Comics

My previous attempts at trying to paint detail with Gelish left a LOT to be desired. The colors would just all run together into amorphous shapes, so I gave up on trying to use Gelish polish to paint designs. In my great wisdom, I went to Michael's and picked up a cheap, $5 set of acrylic paint. Like, painter's paint. I thought that, with a couple coats of Top It Off, I'd have the control and detail I wanted with the lasting power of Gelish.

So I sat and spent a couple hours carefully painting Batman, Red Robin, Red Hood, Flash, Superman, ect. symbols onto my nails. I applied a couple coats of Top It Off and admired my shiny new nails for the day.

Then, that night I hopped in the shower.

I paused at one point to look down at my hands... ALL THE DESIGNS HAD WASHED OFF.

Over the next couple of days I went through the 7 stages of grief, then in the end I decided I'd try again. Although the paint had washed off, it left a faint outline of the original design on the nail. Maybe, by using that as a guide, I could paint with the Gelish polish. As I started painting with the Gelish polish, I noticed that the bleeding effect was completely gone and I had really good control. I finished up my manicure and kept it on for a couple of weeks (got tons of compliments, too!).

After more testing I finally realized: it was the Top It Off that made the Gelish workable. Before apply and curing TIO, the Gelish polish will just bleed together. Once you've slapped a TIO coat on, cured it, and wiped with Cleanser the Gelish polish paints surprisingly well! This is one of the reasons I've developed a motto when doing Gelish nail art: when in doubt, Top It Off!

Tips For Using Gelish To Paint Nail Art
  • Decide on a base color. Do a normal Gelish manicure with your basecolor and finish it up with a cured layer of Top It Off, and wipe with Cleanser
  • You can use inexpensive nail art brushes like these to paint your design with Gelish polish
  • For watery Gelish formulas, put a couple drops of polish onto piece of foil and cure it under your lamp (10 seconds or so for a UV and only 2-4 seconds under a good LED). This thickens up the polish without fully curing it and makes it much easier to control
  • Don't be afraid to use NON-acetone remover on cured designs to help you clean up the art. Sometimes it helps me get that last bit of detail down
And if I ever come up with more tips, I'll be sure to update this list. :)